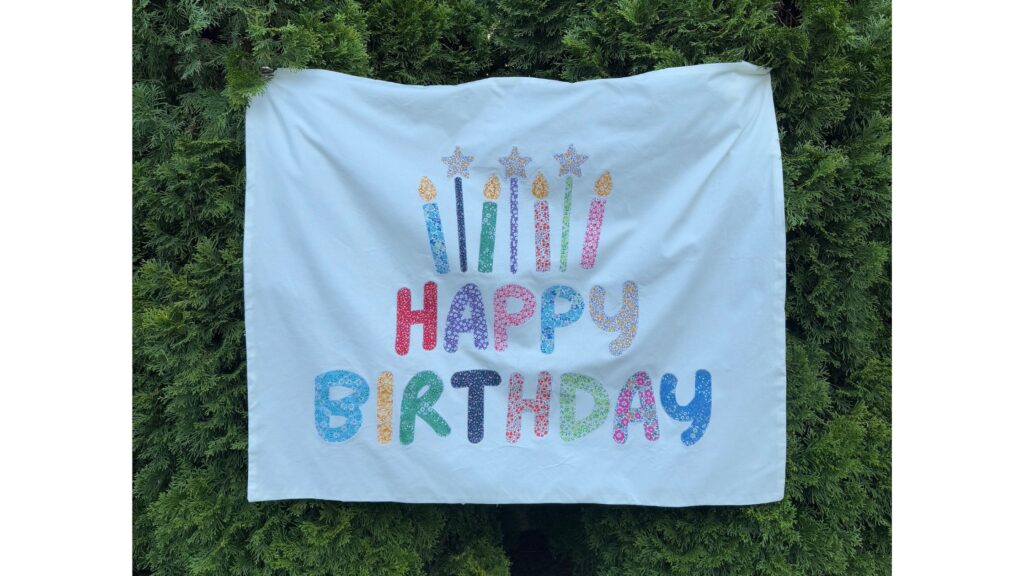
Now that I have two children, I’ve been trying to make more intentional decisions about which party decorations are worth investing in. I’ve been thinking a lot about creating meaningful decorations that can be easily stored and reused for every birthday. So, naturally, a fabric Happy Birthday banner is the perfect solution. It’s high quality, durable, and washable, making it a decoration you can enjoy year after year.
Because it’s handmade, this banner has the potential to become a cherished family heirloom. As you use it to decorate your children’s birthday celebrations over the years, it will become even more meaningful, filled with memories of each special day. In this tutorial, I’ll show you exactly how I designed, cut, attached, sewed, and finished a completely customizable fabric Happy Birthday banner.
If you’re short on time or don’t have the supplies to make your own, I am also offering a few finished Happy Birthday banners in my Etsy Shop made with the same fabric featured in this tutorial. Feel free to take a look if you’re interested!
**This post contains affiliate links, which means I may earn a commission if you make a purchase through one of my links, at no additional cost to you. As an Amazon Associate, I earn from qualifying purchases. I only share products and supplies that I genuinely recommend and believe will be helpful for your project.**
Now into the tutorial!!
Supplies
- Backing Fabric – 2 yards
- Decorative Fabric – Scrap fabric, I used a fat quarter bundle.
- Heat-n-bond Lite
- Sewing Kit Essentials – If you are new to sewing, I have a comprehensive list available here.
How to Make a DIY Fabric Happy Birthday Banner
Step 1) Choose and Prepare Your Fabric
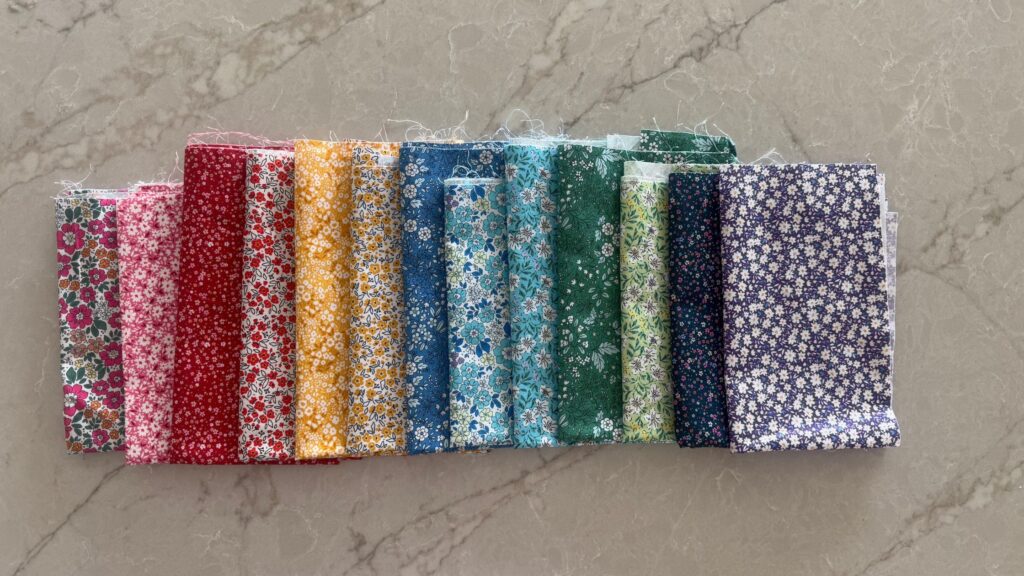
Choose your color palette and overall style
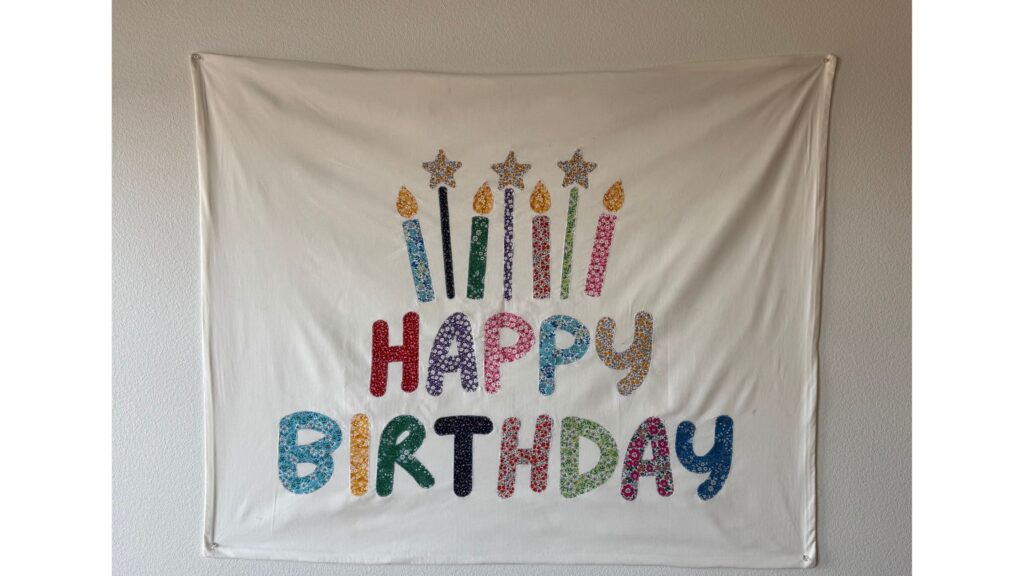
Think about the colors, patterns, and overall vibe you want for your banner. I have two girls, so I wanted something that could work for both of their birthdays. I settled on these fun and colorful floral prints because they feel girly and festive without being tied to a specific theme.
Decide if you want to add embellishments.
Now for the fun part. Decide which embellishments work best for your style. They are an easy way to add a fun and festive touch to your banner and make it one of a kind.
Some ideas include:
- Birthday cakes
- Candles
- Birthday hats
- Balloons
- Hearts
- Stars
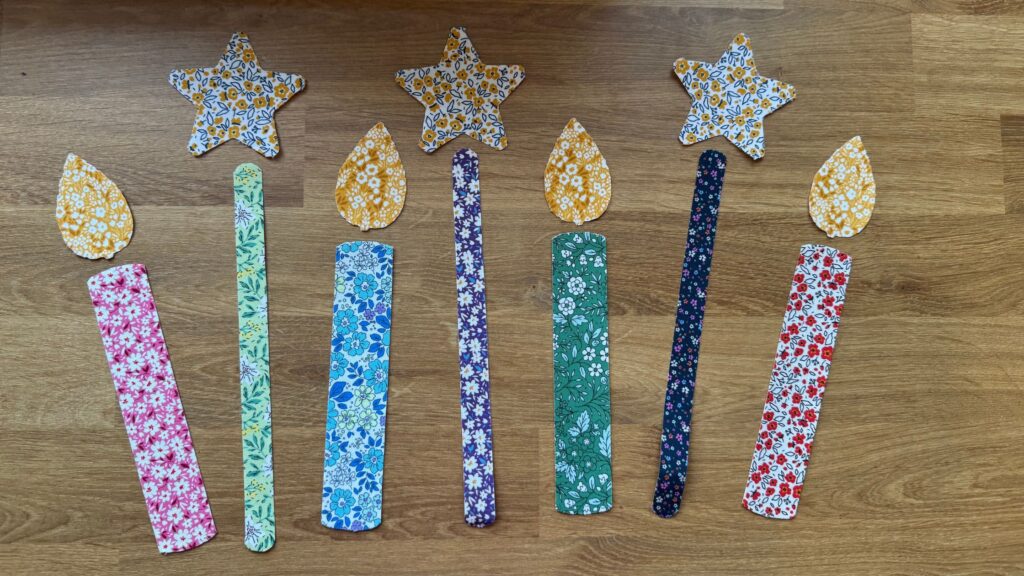
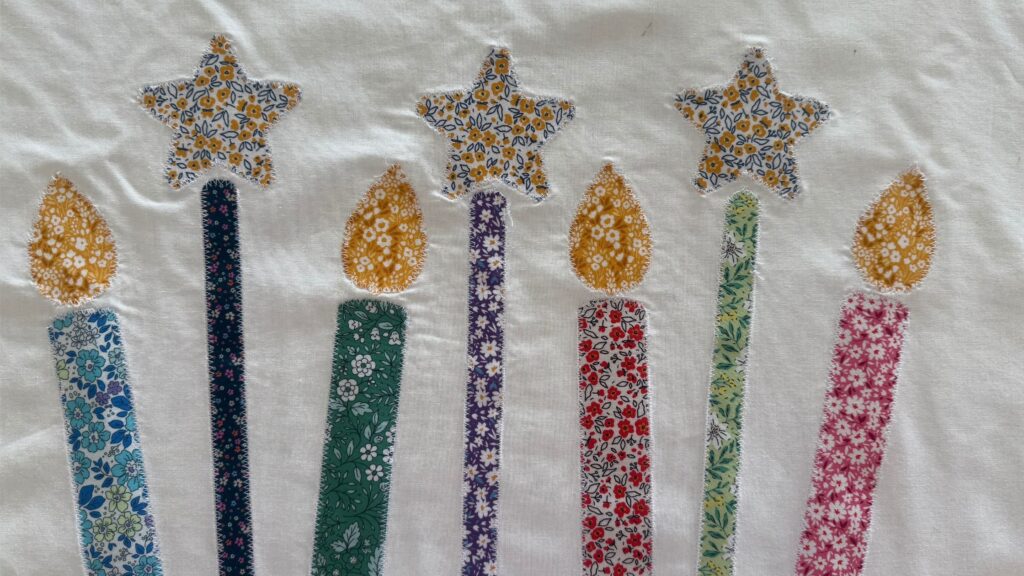
For my banner, I decided to keep things simple with candles. They’re festive, but I won’t feel tied to a specific party theme.
Step 2) Cut the letters
Cricut
If you are using your Cricut, create a mockup in Canva or Cricut Design Space. Then determine the sizing that you want your letters to be in relation to the rest of the banner. Finally, cut out the letters as you typically would.
By Hand
For this method, create a mockup in Canva. Determine what font and extra embellishments you want to use. Then determine how large you would like each item to be. Print out and cut all of the letters and additional embellishments. Trace all of the items onto the fabric and cut them out.
Pro Tip: I find it easier to add the heat-N-Bond to the fabric before cutting it out. This way you don’t have to worry about lining up the letters or getting adhesive on your iron.
Step 3) Finalize the Banner Design
Determine the perfect layout
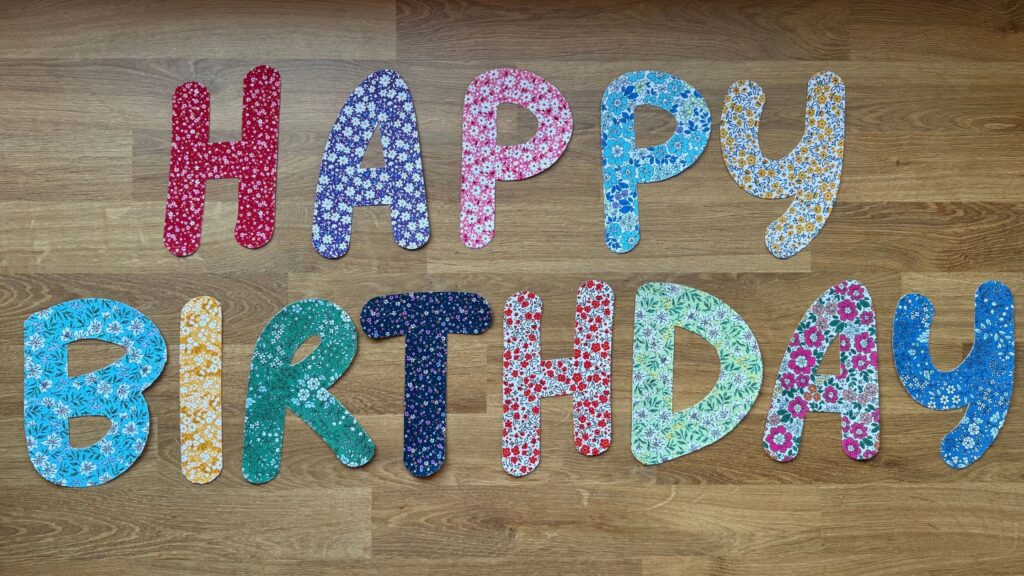
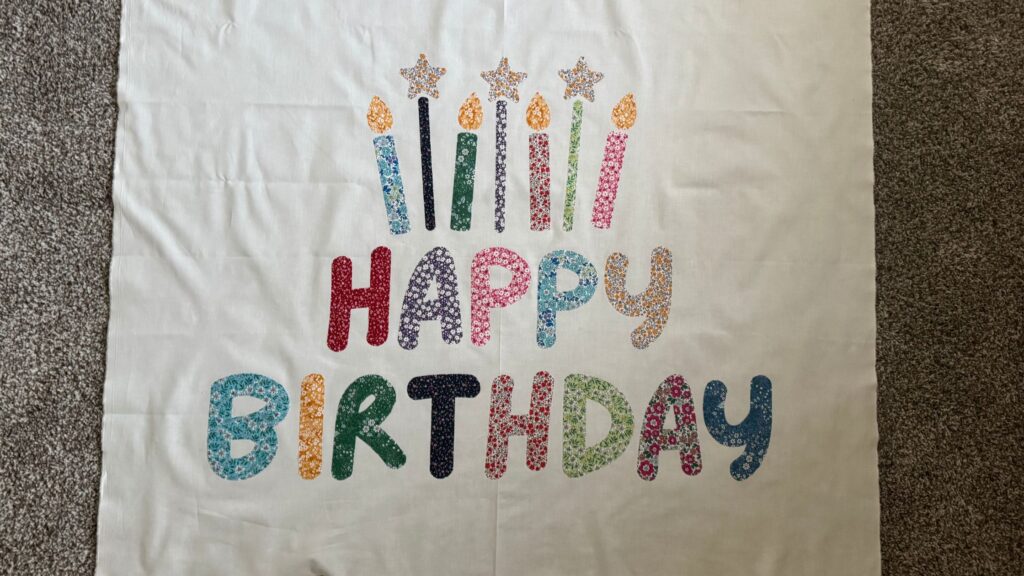
Once you get the letters and embellishments cut out, verify that your layout is correct. You can test different arrangements until you find one you are happy with.
Step 4) Attach the Letters
Attach Using Iron-On
Once you are happy with the layout, remove the paper from the back of the iron-on and apply it using the directions on the package.
Sew around the edges
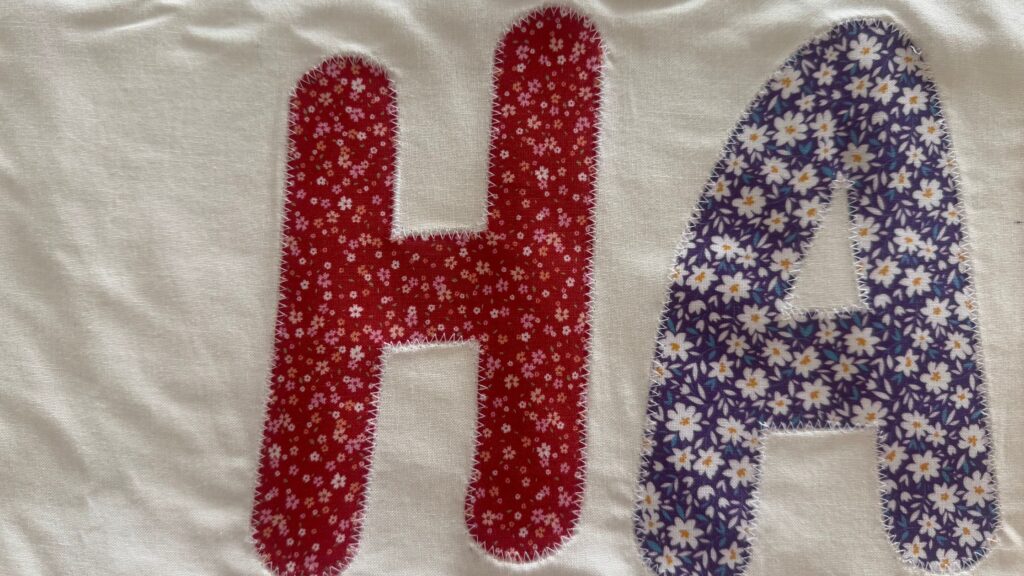
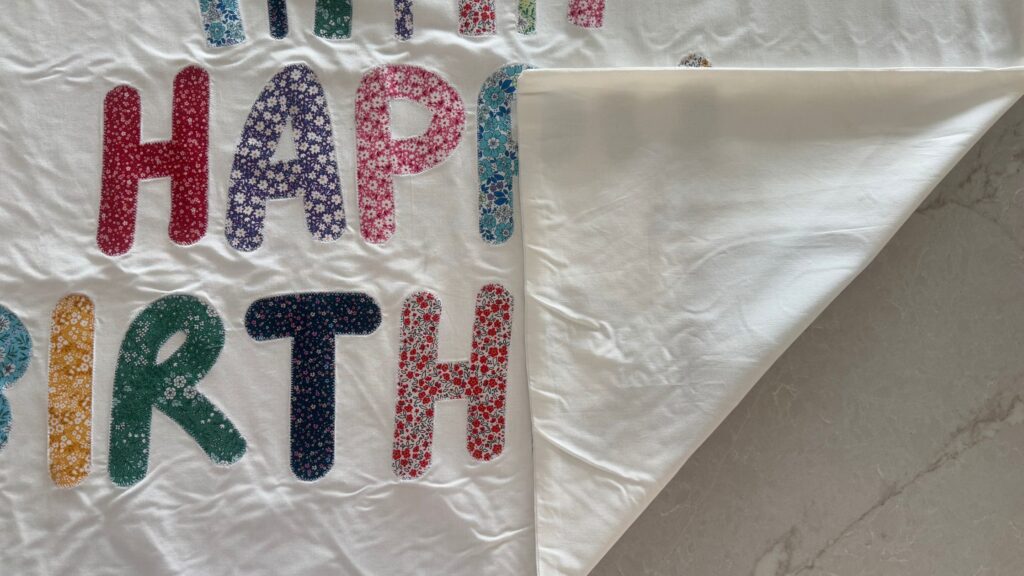
Sew around each exposed edge. I chose to use a zig-zag stitch in white. The white thread matched the backing fabric as well as the floral fabric. You can choose to color match each piece if you want a more seamless look.
This step can take a lot of time. But it increases the quality and ensures that the letters won’t peel off after you have had the banner for a few years. I think this extra step takes your banner from looking homemade to having a more professional finish.
Step 5) Attach the hanging loops
Cut out the rectangles
These loops are fully customizable depending on how long you want each loop to be. I cut four rectangles that were 4″ x 8″. But you can make each rectangle larger or smaller based on your preferences and needs. You can also adjust how many loops you want to add.
Finish the loops
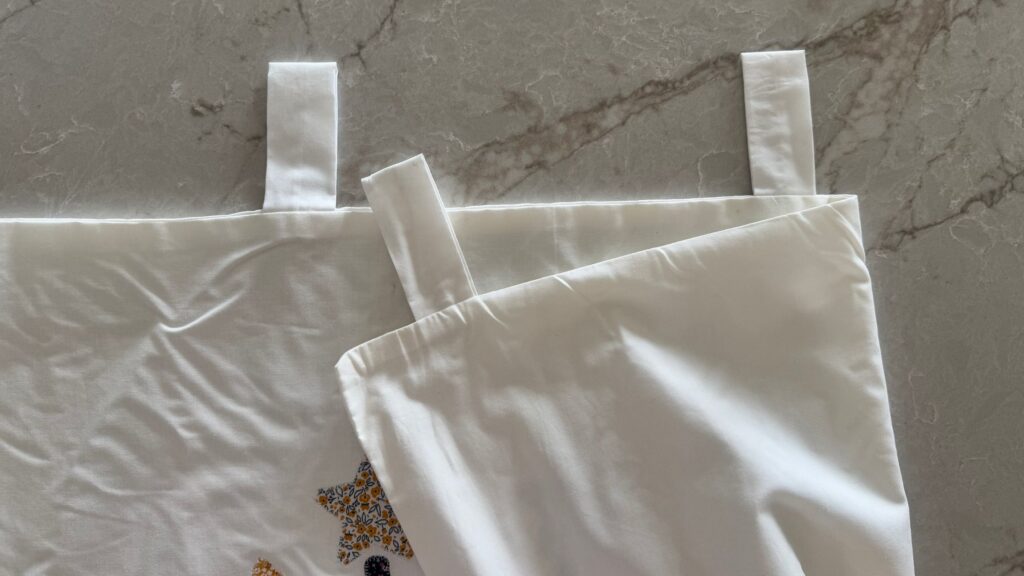
Once you have your rectangles, fold the pretty sides together and sew with a 1/4″ seam allowance. Then flip each piece right side out and position the seam at the backbefore ironing them flat. Finally, fold them in half with the seam facing inward to hide it. Your finished loops should be about 1.75″ x4 ” if you followed my dimensions.
Step 6) Attach the Backing Fabric
Assemble the banner sandwich
The final step is attaching the backing fabric. Lay the two pieces of fabric pretty sides together. Put the loops where you want them on the sign, sandwhiched between the two pieces of fabric, with the exposed edge lined up with the edge of the fabric.
Sew the banner
Sew around the entire banner, leaving a 3″ gap to turn the banner right side out. Turn the banner right side out. Iron the banner flat to create crisp seams. Finally, sew up the 3″ gap that you have left. I stopped here, but you can top stitch as well if you like that look.
You don’t have to add backing fabric, and a lot of people don’t. I, however, recommend it because it will increase the quality and durability of your banner. If you truly want an heirloom piece, this step will help ensure you get there.
Step 7) Admire Your Work!!
Tips for the Best Fabric Birthday Banner
Add Iron-On Adhesive and Topstitch Each Letter.
Most handmade banners I see are just made using iron-on adhesive. This means that over time, as the piece ages and is used, there is potential for the letters or embellishments to start falling or start to fray. By taking the time to add the additional topstitching, you will create an heirloom piece that is less likely to have letters fray or peel off.
Add Hanging Loops
Adding hanging loops will make the banner easier to display time after time. You will be able to easily hang up the banner in different locations, making you more likely to use the beautiful piece you have created.
Add a backing fabric
Most handmade banners are made with a single fabric layer. This makes them flimsy and more susceptible to tearing and damage. By adding a backing fabric you are creating a high-quality piece that will look beautiful when hung and last for years.
Customization Ideas
Here is a list of customization ideas to get your creative juices flowing
Fabric & Color
- Choose a specific color palette
- Use the birthday child’s favorite colors
- Create a rainbow color palette
- Use pastels for a softer look
- Coordinate the fabrics with a party theme
Banner Shape & Size
- Create a smaller banner that can be held
- Make a large banner perfect for a party backdrop
- Make a banner you can use for yearly pictures
Letter & Embellishment Ideas
- Add the birthday child’s name
- Add birthday candles
- Add birthday cakes
- Add balloons
- Add stars
- Add hearts
- Add birthday hats
- Add bows or flowers
More Personalized Options
- Use fabric from a loved one’s clothing
- Make a banner using fabrics from previous birthday projects
- Make interchangeable age numbers
I hope this DIY fabric Happy Birthday banner inspires you to create a reusable birthday decoration that your family can enjoy for years to come. A handmade fabric birthday banner is a simple way to add color and personality to your party decor while creating something more meaningful than a disposable decoration.
The best part about making your own fabric Happy Birthday banner is how easy it is to customize. You can choose your favorite fabrics and colors, add birthday embelishments, or personalize the banner with your child’s name or age. Whether you’re planning a colorful childrens birthday party, a simple family celebration, or a themed birthday party. this DIY birthday banner can be designed to fit your style.
Because this banners is made from fabric, you can fold it up and save it after the party, the bring it out again for the next birthday. Over time, it can become a cherished part of your family’s birthday traditions.
If you make your own DIY fabric birthday banner, I’d love to see how you customize it! Save this tutorial to Pinterest so you can easily find it when you’re ready to start your next birthday party decoration project!
Leave a Reply