My girls love to play pretend and dress up all of the time. I’ve noticed that a lot of the store bought costumes never really hold up the way I want them to. This is why I started creating my own DIY Fabric crowns. They are durable, soft, customizable, and best of all, reusable. I have seen so many people on Pinterest, Etsy, and Instagram who sell similar crowns, but I have found a way to make them by myself for a fraction of the price. In this tutorial, you will find the exact dimensions that I have used to make my crown and step-by-step instructions. This tutorial will help you create beautiful fabric crowns easily on your own.
This post contains Amazon affiliate links. As an Amazon Associate, I earn from qualifying purchases — at no extra cost to you.
Why Make a Frabic Crown?
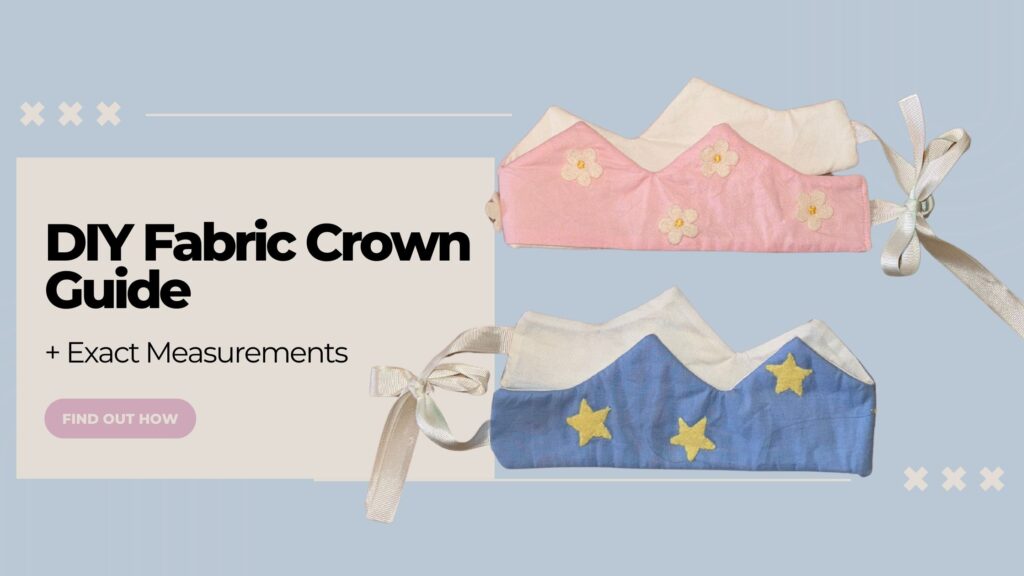
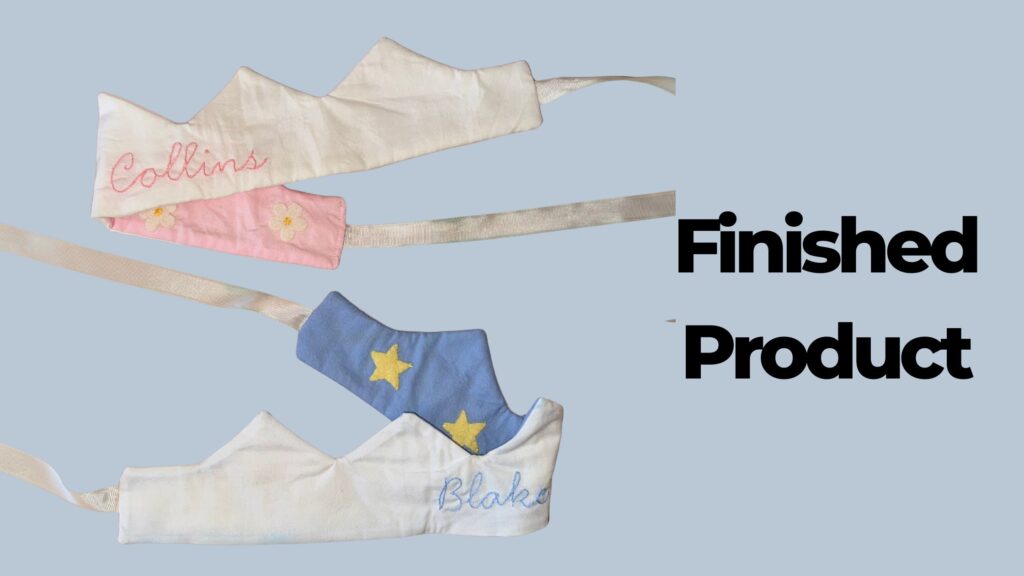
A fabric crown will allow your children to be comfortable while wearing it. It is durable and washable, as well as being more eco-friendly. They are fully customizable, which makes them perfect for birthdays, costumes, and pretend play. I am making these crowns as Christmas gifts for my daughters, nieces, and nephews. Since they are fully customizable, I am planning to add their names and personalized embellishments. For my daughter, I used pink fabric with white felt flowers. For my niece, I used blue fabric with yellow felt stars. Finally, for my other daughter, I used purple fabric with a white felt heart.
Materials You Will Need
- Fabric – Quilting cottons work best. You may need multiple colors depending on your personalization.
- Batting – This will add some structure, helping the quilt stand up.
- Coordinating Ribbon – This is what you will use to tie the crown on.
- Embroidery Floss – This is the exact pack that I used.
- Felt – This is the felt that I used.
- Other embellishments
You will also need basic sewing supplies. If you are new to sewing and need help completing your sewing kit check out my article here.
Choosing Your Fabric & Design
I like to make reversible crowns. The front side is more basic, with just the child’s name embroidered on it. The backside is where I like to add more embellishments. I tend to use basic felt shapes like stars, hearts, flowers, or butterflies. I have several example images shown below.
You can personalize the crowns however you see fit. I recommend starting by deciding what color crown you would like to create. Then move on to the embellishments. I think it is best if you choose embellishments that match the personality of the child you are making the crown for. Make sure you aren’t putting any choking hazards or anything that can be removed on the crown if you are giving to younger children. Here are a few theme ideas 1st birthday crown, fairytale crown, superhero crown, animal crown, and personalized name crown.
Step-by-Step Guide
Step 1: Creating the Crown pattern
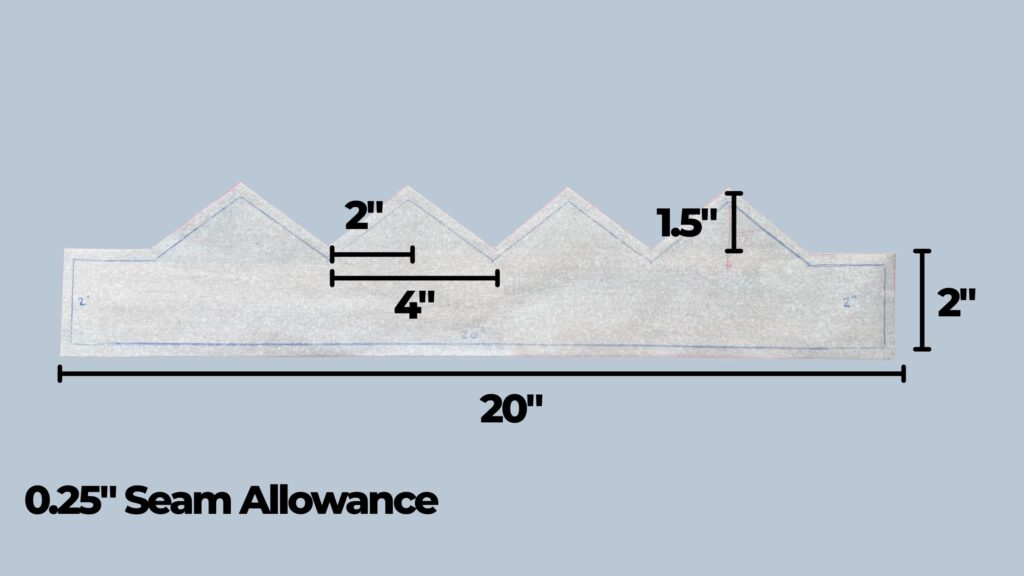
- Use brown kraft paper or parchment paper to create a pattern
- The entire width of the crown should be 20″
- The height of the band should be 2″
- Each peak should extend 1.5″ above the band
- Each triangle is 4″ wide, and the peak is in the middle at 2″
- Add a .25″ seam allowance
- Cut out your pattern
- Trace your pattern onto the fabric
Step 2: Adding Embellishments
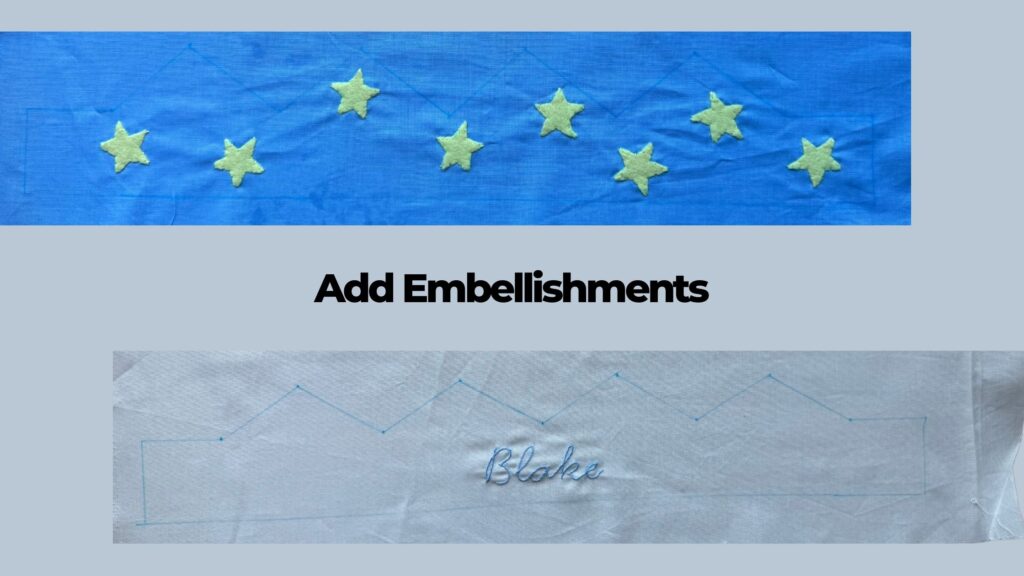
- Add your embellishment to the crown within the outer limit
- Make sure you leave a .25″ seam allowance without any embellishments
Embroidered Name
- Find a script font that you like on Canva, Word, or another program
- I used the font “Handsome” on Canva
- Trace the font onto the crown
- I used a whipped backstitch, many YouTube videos can teach you how to do this stitch
- There are many other stitches that you could use, depending on the look you are going for. Some suggestions are back stitch, stem stitch, chain stitch, split stitch, and satin stitch
Adding Felt Items
- Draw the shape that you like on a coordinating piece of felt
- Cut out the felt shape
- Use a blanket stitch and embroider the item on the crown
Step 3: Cutting the Fabric Pieces
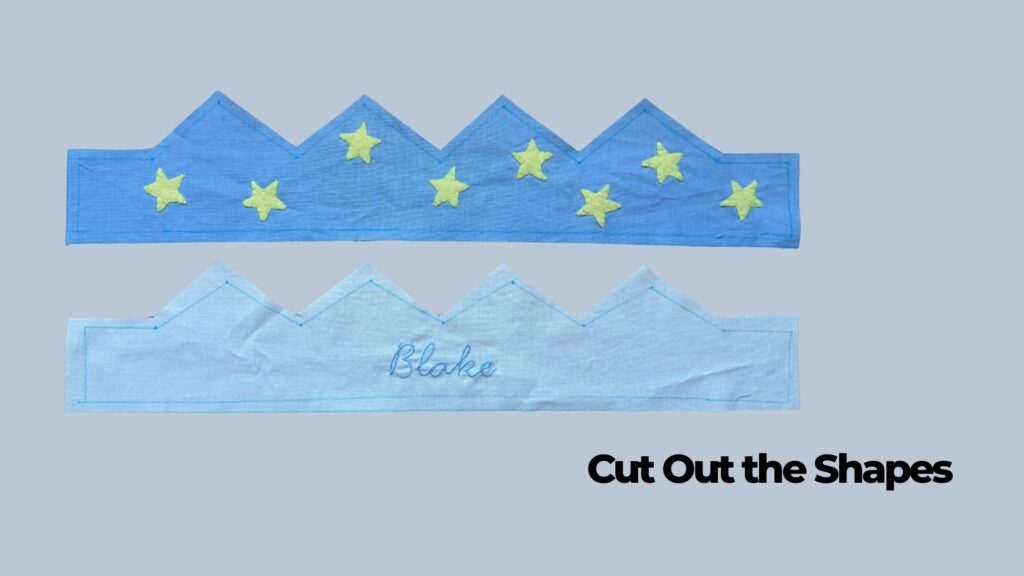
- Cut out the front and back pieces of the crown
- ***Make sure to include the .25″ Seam Allowance***
- Cut out a piece of batting the same size
Step 4: Sew the Pieces Together
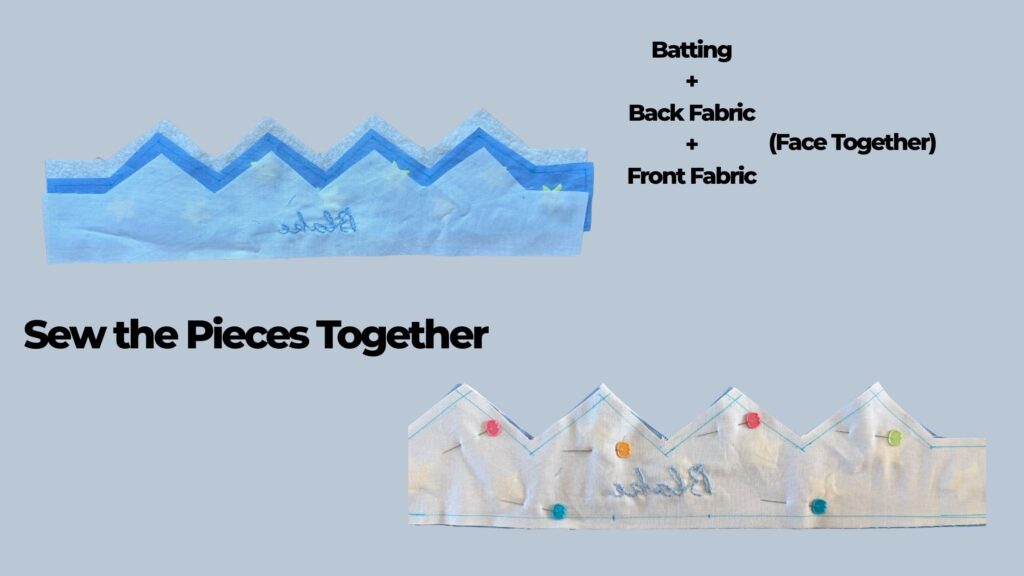
- Assemble the 3 layers of the crown.
- The first layer is the batting, followed by the back piece of the crown face up, followed by the front piece of the crown face down.
- The ribbon needs to be added to the crown, put it between the two fabric pieces, with the length of the ribbon inside the crown.
- Sew around the entire crown, leaving a 1.5″ gap so you can turn it right side out.
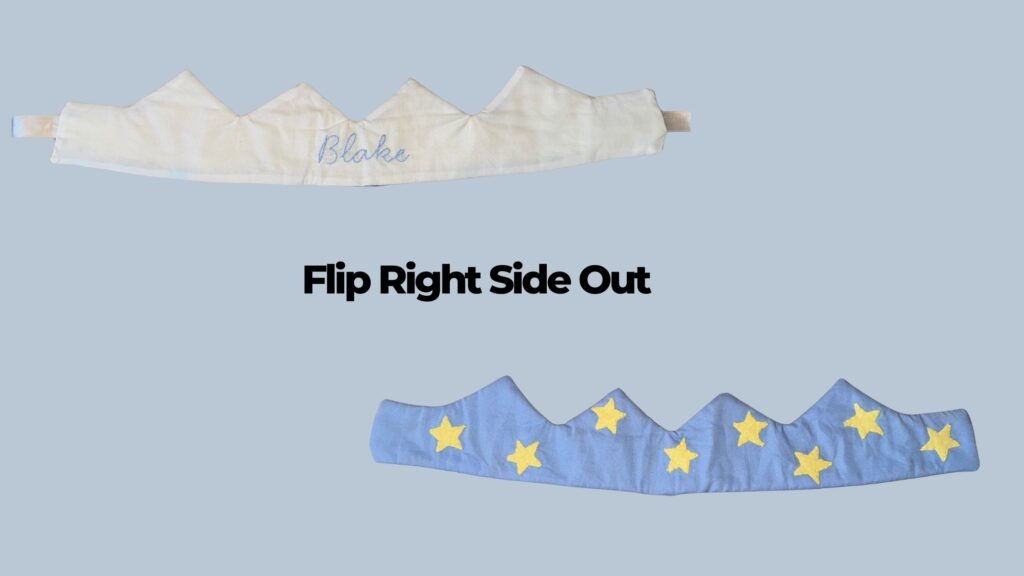
Step 5: Flip Right Side Out
- Turn the crown right side out
- Use something pokey but blunt to push out the peaks of the crown
- Sew the hole in the bottom back up by hand
Step 6: Admire Your Work
FAQs
- Can I wash the crown?
- You can wash the crown if it is just embroidered. I would recommend washing it on a delicate wash. If you have any embellishments that are hanging off, I recommend spot treating them and not fully washing them.
- What fabrics hold their shape best?
- I have found that quilting cotton works best for the crown.
- Is a sewing machine required?
- Yes, a machine is required to create a crown.
- Can I scale this pattern for adults?
- Yes, you can scale the crown by measuring the head of the adult. Then you can add additional points based on the measurements.
- How do I make the crown stand up better?
- If you want the crown to stand up better, add more batting.
Creating a fabric crown is an easy, customizable, and budget friendly project that adds a magical touch to birthdays, dress up time, and everyday imaginative play. With the right fabrics, embellishments, and a few simple sewing steps, you can make a beautiful, durable crown your child will love for years.
If you are looking for more DIY craft ideas, holiday projects, and party inspiration, be sure to join our Facebook community DIY Parties, Decor, and Holiday. We’d love to see what you create!